- Create an empty boot ROM ($F8)
- Add exec module
- Add 1Mb scan table
- Patch exec to use the 1Mb table
- Add the rest of the boot ROM module
- Create an empty expansion ROM ($E0)
- Add 1Mb ROM header
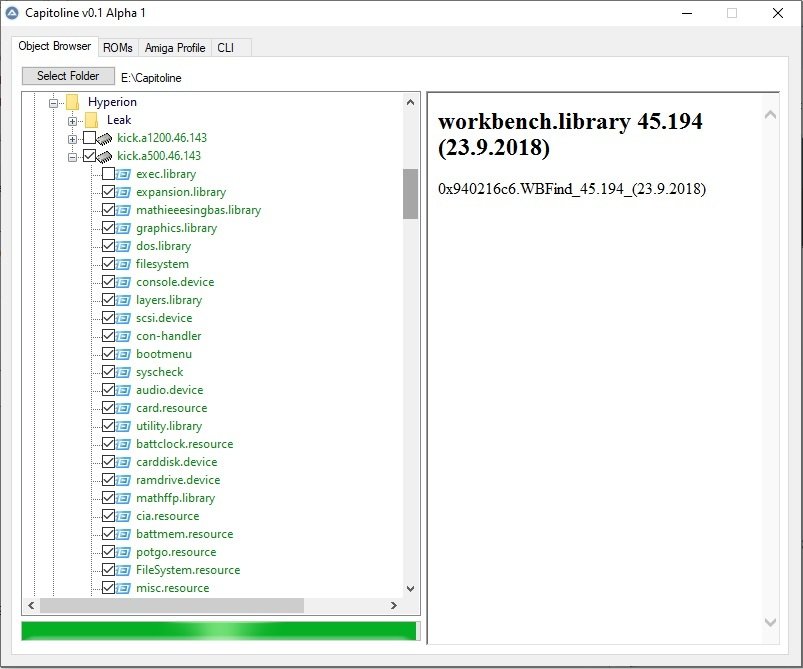
- Add Workbench and Icon libraries
- Save new ROM
Why? the Hyperion (3.1.4/3.2) ROM is 512k, this is not enough space for all of the traditional components, so they decided to leave workbench.library out (like some A4000 ROMs) but they also leave out icon.library, so these must be loaded from disk, by using a 1Mb ROM you can load these missing components into ROM, save some RAM and boot a bit quicker – there’s also space to add more stuff (if you want).
First a bit of background, the Amiga supports 3 ROM “banks”, two of 512k and one 1Mb chunk, the first 512k “boot” bank is located at $F80000, then an extended 512k bank at $E00000 and finally another 1Mb bank at $A80000.
When exec starts it looks in the first bank ($F80000) for ROMTAG’s which are like library headers (scsi.device etc.), the 3.1 ROM on the CD32 also searches the second bank at $E00000, but most ROMs don’t do this as most are designed for 512k, so to force exec to search $E00000 we have to patch the list of areas it searches. We’re kind of lucky because it also searches another bank used for expansion ROMs (e.g. A590) at $F00000) so there’s already a mechanism to search additional banks which we can hijack.
The Hyperion ROM is different to the original 3.1 ROM as it appears to have an “exclude” area, so this patch is specifically for Hyperion and won’t work on 3.1. And of course, this is also different to the early 256k ROMs which actually load at $FC0000, but that’s another story…
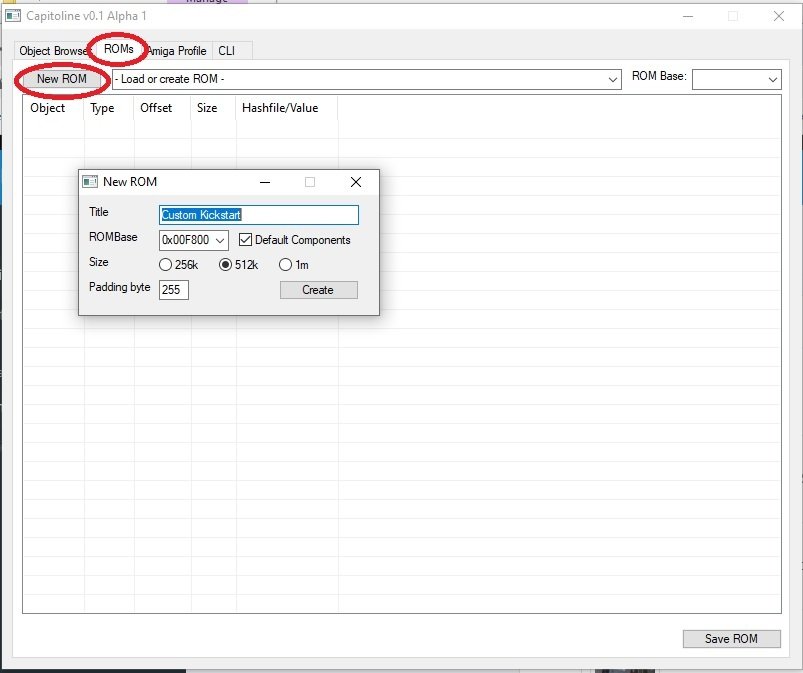
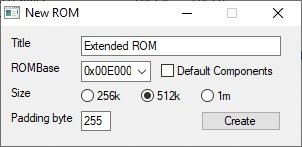
Click on [ROMs] then [New ROM], use the defaults and click [Create]
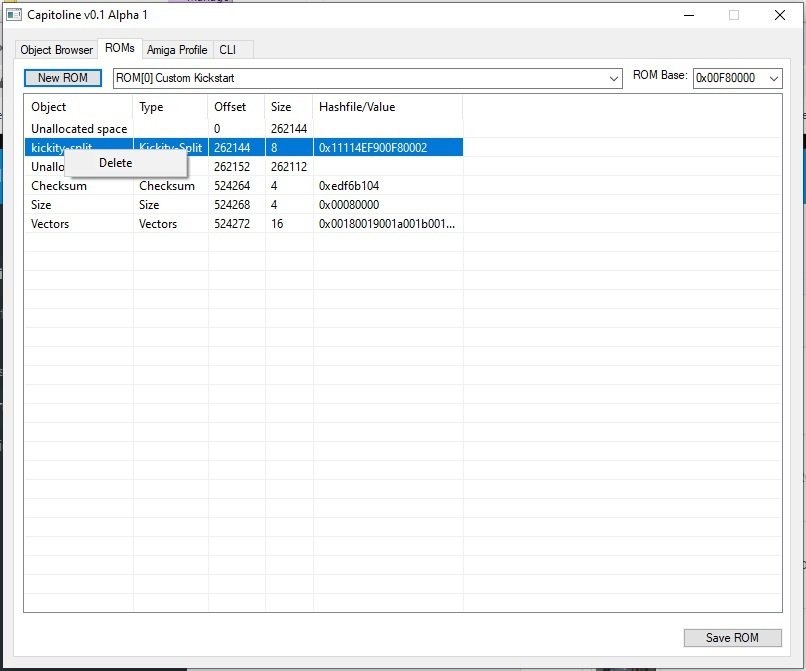
You can delete the kickity-split as it’s not needed for later kickstarts
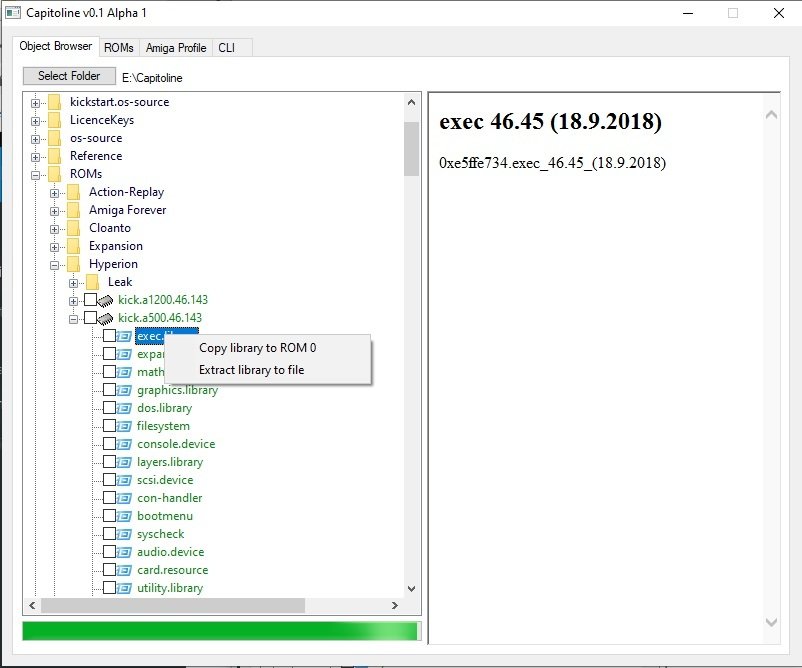
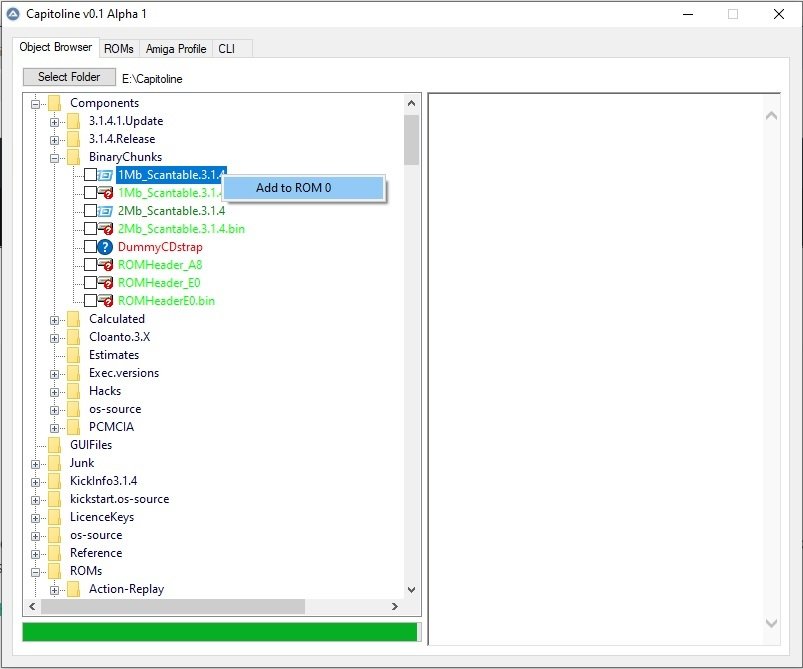
Go back to your object browser, find your source ROM, expand then right-click on exec.library to “Add to ROM 0”
Browse to the [Components] folder and add the 1Mb_Scantable.3.1.4 (not the one ending in .bin), [Add to ROM 0] again
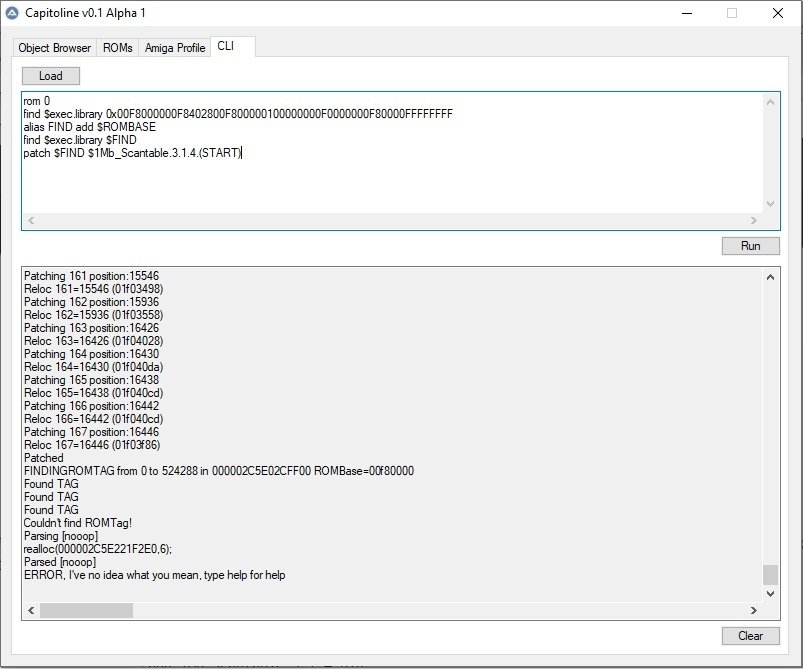
Click on the CLI tab, apply the patch to exec;
#Select ROM 0, this is very important in the GUI as it will crash if you don't specify it!
rom 0
#Grab ENDSKIP of exec, alert.hook forms part of the module but must not be skipped
alias ENDSKIP romdata $exec.library.(ROMTAG.ENDSKIP) 4
#Chop off the first two byes of ENDSKIP "0x" this address includes the ROMBASE
alias ENDSKIP mid 2
#Make the start of the loaded Scantable took like the old one (it's the later bits that are important)
patch $1Mb_Scantable.3.1.4.(START) 0x00F80000$ENDSKIP
#Get the address of the new Scantable
alias STSTART $1Mb_Scantable.3.1.4.(START)
#Add the ROMBASE to this address
alias STSTART add $ROMBASE
#Find the existing Scantable
find $exec.library 0x00F80000$ENDSKIP00F800000100000000F0000000F80000FFFFFFFF
#Add the ROMBASE to get a proper Amiga address after the ROM is loaded
alias FIND add $ROMBASE
#Find where the old address is mentioned, in theory this could be just random data, but that's very unlikely.
find $exec.library $FIND
#Patch the old Scantable reference to the new address
patch $FIND $STSTART
Note: This patch as been updated to work generically for all scantables for all the various 3.1.4/3.2/3.2.1 execs as these are often different, luckily, they only differ in the first “exclude” section, and that’s related the the ENDSKIP of the exec module, so we just copy that address from the ROMHEADER.
This patch;
- Selects ROM 0 to work on
- Creates a variable $STSTART which is the address of the new scan table as it will appear in the ROM once loaded (note, the name “1Mb_Scantable.3.1.4” must match the file you added above)
- Finds the existing scan table, which is a list of areas in the memory to search, it’s pairs of long words, start/finish the first pair being an exclude, then the $F8 bank ($F8->$10), then the $F0 bank (expansion roms such as A590), then a terminating $FFFFFFFF. The find command creates a variable (alias) “$FIND” which will hold the location where it found it.
- The “alias .. ADD” command will add the value of $ROMBASE (from the current selected ROM) to the FIND alias as all addresses in ROM will be their offset in the ROM + the ROMBASE
- Then we find where this address is referenced, this is a pointer to the scan table ($FIND will now hold the address of the old scan table)
- So then we patch the pointer to point to the new scan table (which also contains the $E0 bank)
Go back to your object browser, and add the rest of the components you want in the boot ROM, basically everything except exec.library that’s already there.
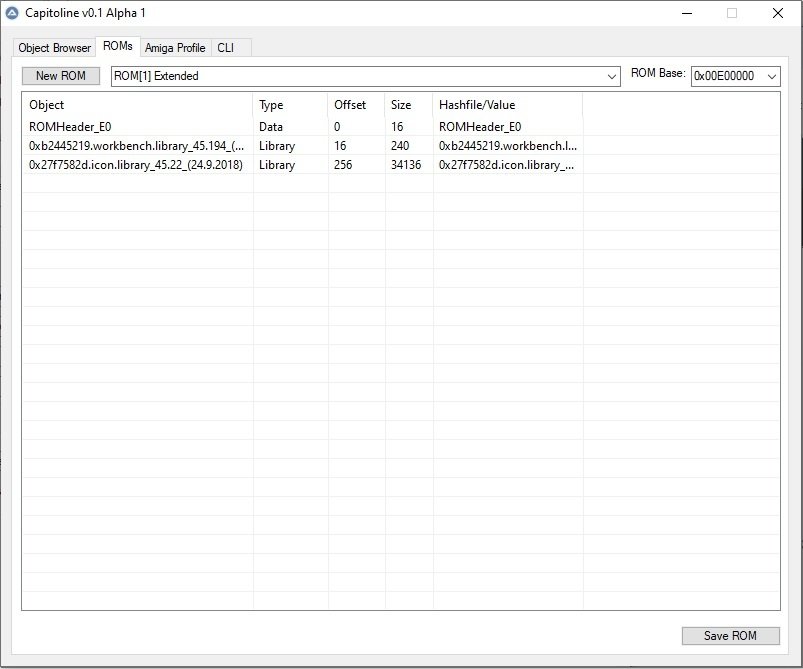
Create a new (extended) ROM, don’t use the default settings, this time you need to create an $E00000 ROM, without the default components, name it something different.
Add the $E0 romheader and the Workbench and Icon libraries, you’ve quite a lot of space, so you can add whatever you like here.
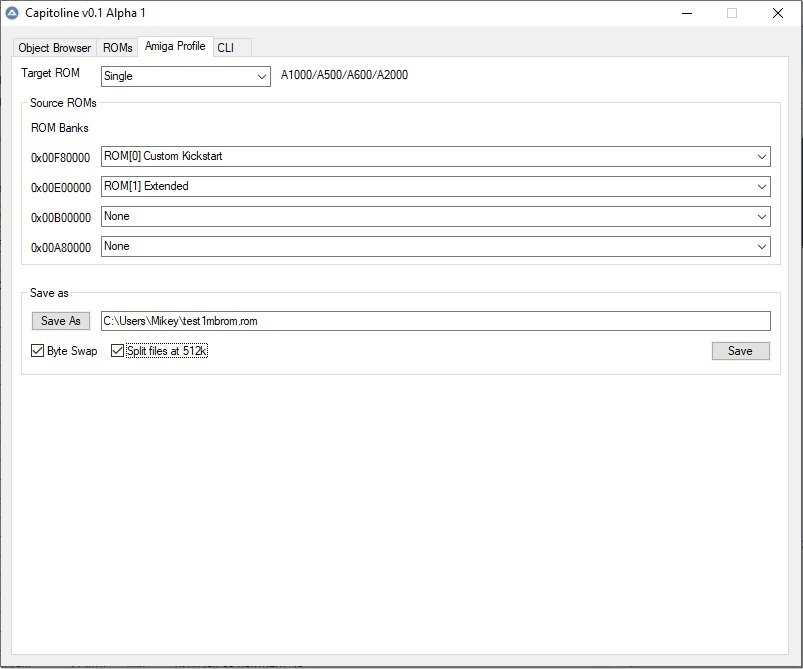
Click on the “Amiga Profile” tab, select the target architecture, your two ROMs “banks”, whether you want the output split (e.g. for a TL866), byteswap etc. and click [Save]